First Launch
Start BibexPy and take a quick tour of the home screen.
python -m bibexpy # macOS / Linux: python3 -m bibexpy
The terminal prints the server address, storage location and settings file:
  BibexPy v2.0.2 "Helium"
  -> UI:       http://127.0.0.1:6060/
  -> Storage:  C:\Users\you\.bibexpy\storage
  -> Settings: C:\Users\you\.bibexpy\.env
  (Press Ctrl+C to stop)
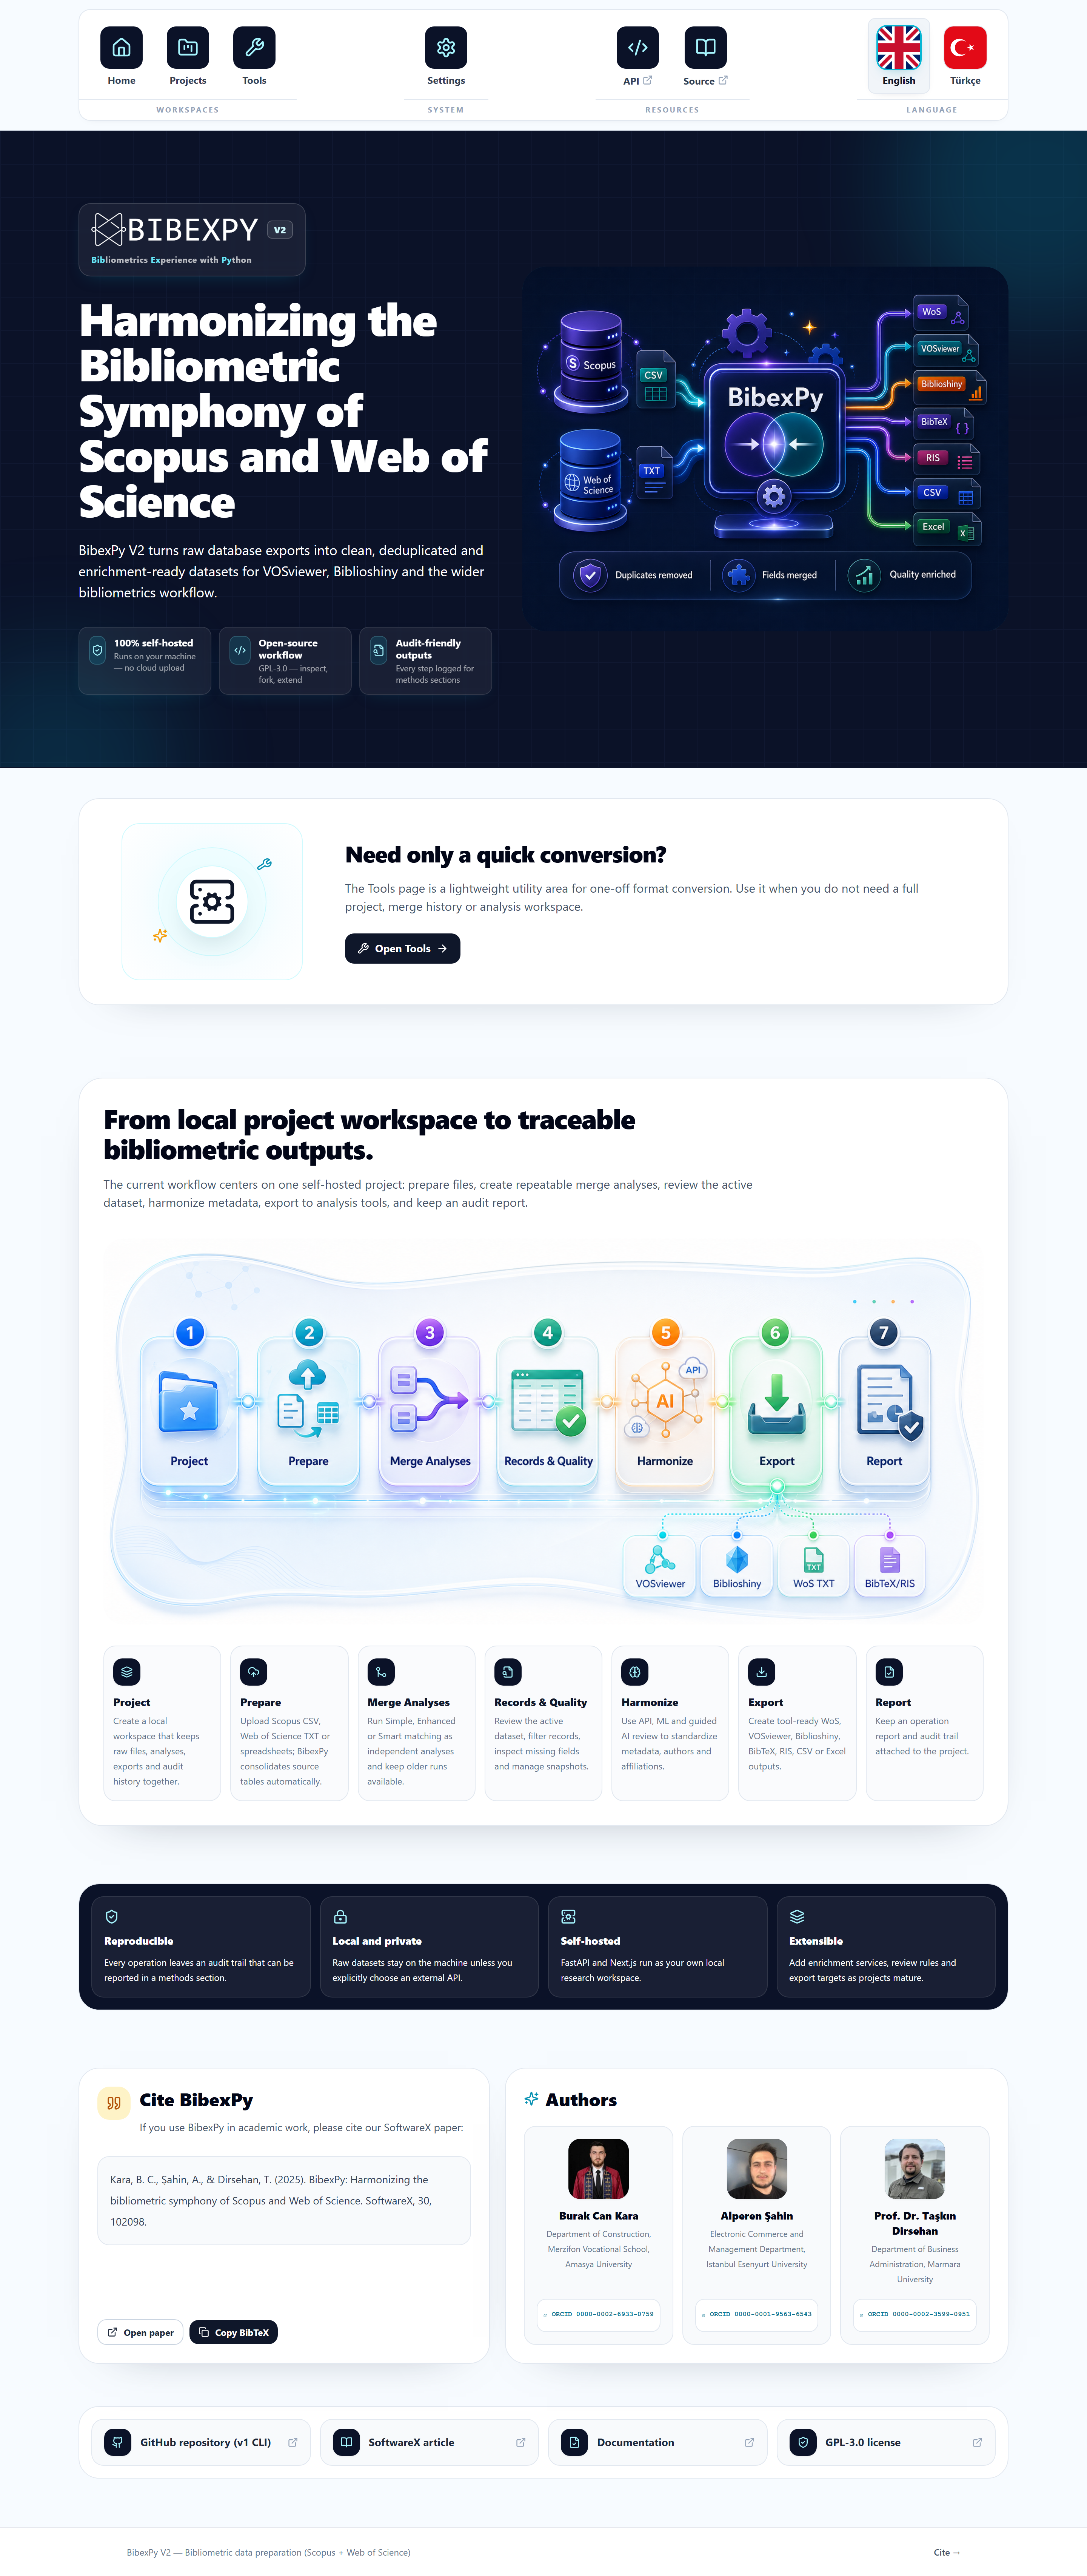
The home screen
- Projects — workspaces that hold your raw exports and analyses. Start here.
- Tools — standalone utilities (e.g. the Format Converter) that work without a project.
- Settings — API keys for enrichment providers and the optional LLM, storage paths, matching thresholds.
- Help — opens this documentation.
Your first run, in three minutes
- Open Projects — the built-in Simple Project is already there with real WoS + Scopus sample data.
- Click the project and press Start Smart Merge. Preparation (file conversion) runs implicitly.
- Follow the pipeline left to right: Records & Filtering → Harmonization → Export → Report.
Windows PATH offer
On the first interactive launch, if the bibexpy command isn't on your PATH, BibexPy asks
“Add the bibexpy command to your PATH? [Y/n]”. Answer Y, open a new
terminal, and from then on you can start the app by simply typing bibexpy.
Stopping the server
Press Ctrl+C in the terminal. Your data is already on disk — nothing to save.